How to cut/trim video with Windows Movie Maker?
1. This tutorial shows you how to cut a small portion from a long video file. Or, trim unwanted parts of your video then get what you need. Just several clicks with Windows Movie Maker.
2. Firstly, import your videos into Windows Movie Maker. The videos will be added to the Timeline by default.

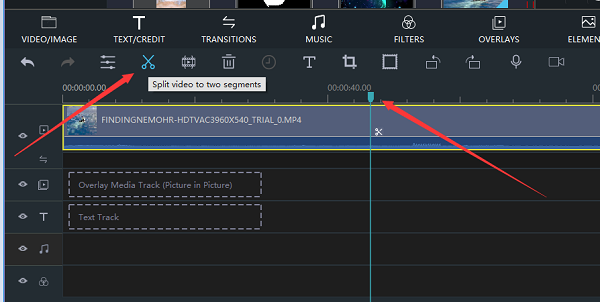
3. Cut video at the target location. Just drag & drop the Pointer to a specific location, then click the scissor button. Then your video will be cut into two parts. You can cut multiple times to get multiple video parts.

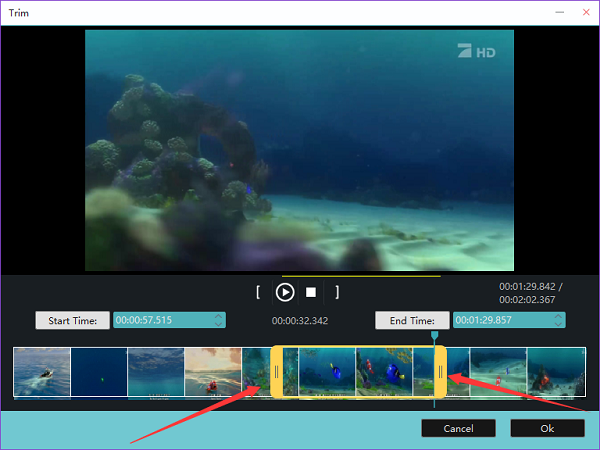
4. Right click on your target video, then select "Trim". Then you can see the trim video interface. You can drag and drop to set the Start Time and End Time. Then click Ok to save a portion of your video.

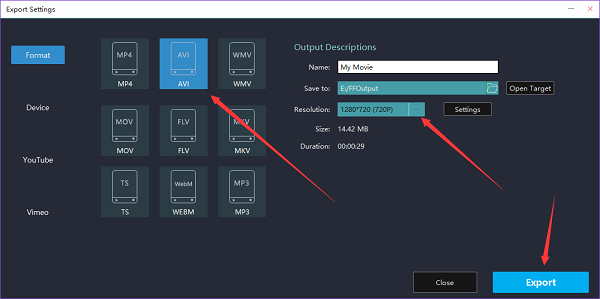
5. Export edited videos to any format you want. You can select video format, output location, resolution, etc.

6. Now, you know how to cut/trim video with Windows Movie Maker. If you do not have the software, please download Windows Movie Maker via the official links below.
|
Windows Movie Maker 2021 |
|
|
Windows Movie Maker 2016 Classic |
|